One of the game-changing features of Synology‘s NAS (Network-Attached Storage) devices is their ability to run Docker, the industry-standard containerization technology. This opens up the possibility of running all kinds of applications on the NAS, turning them into home servers with boundless possibilities.
One of things I wanted to run on my own Synology NAS is RabbitMQ, the popular open-source message broker. I intend to use this as the heart of a distributed home climate measuring project, with a bunch of low-cost Raspberry Pi devices sending regular sensor readings to a database, or directly to a real-time web application.
Here’s how to go about installing RabbitMQ on a Synology NAS, as of January 2020. The whole process should only take around 15-30 minutes at most.
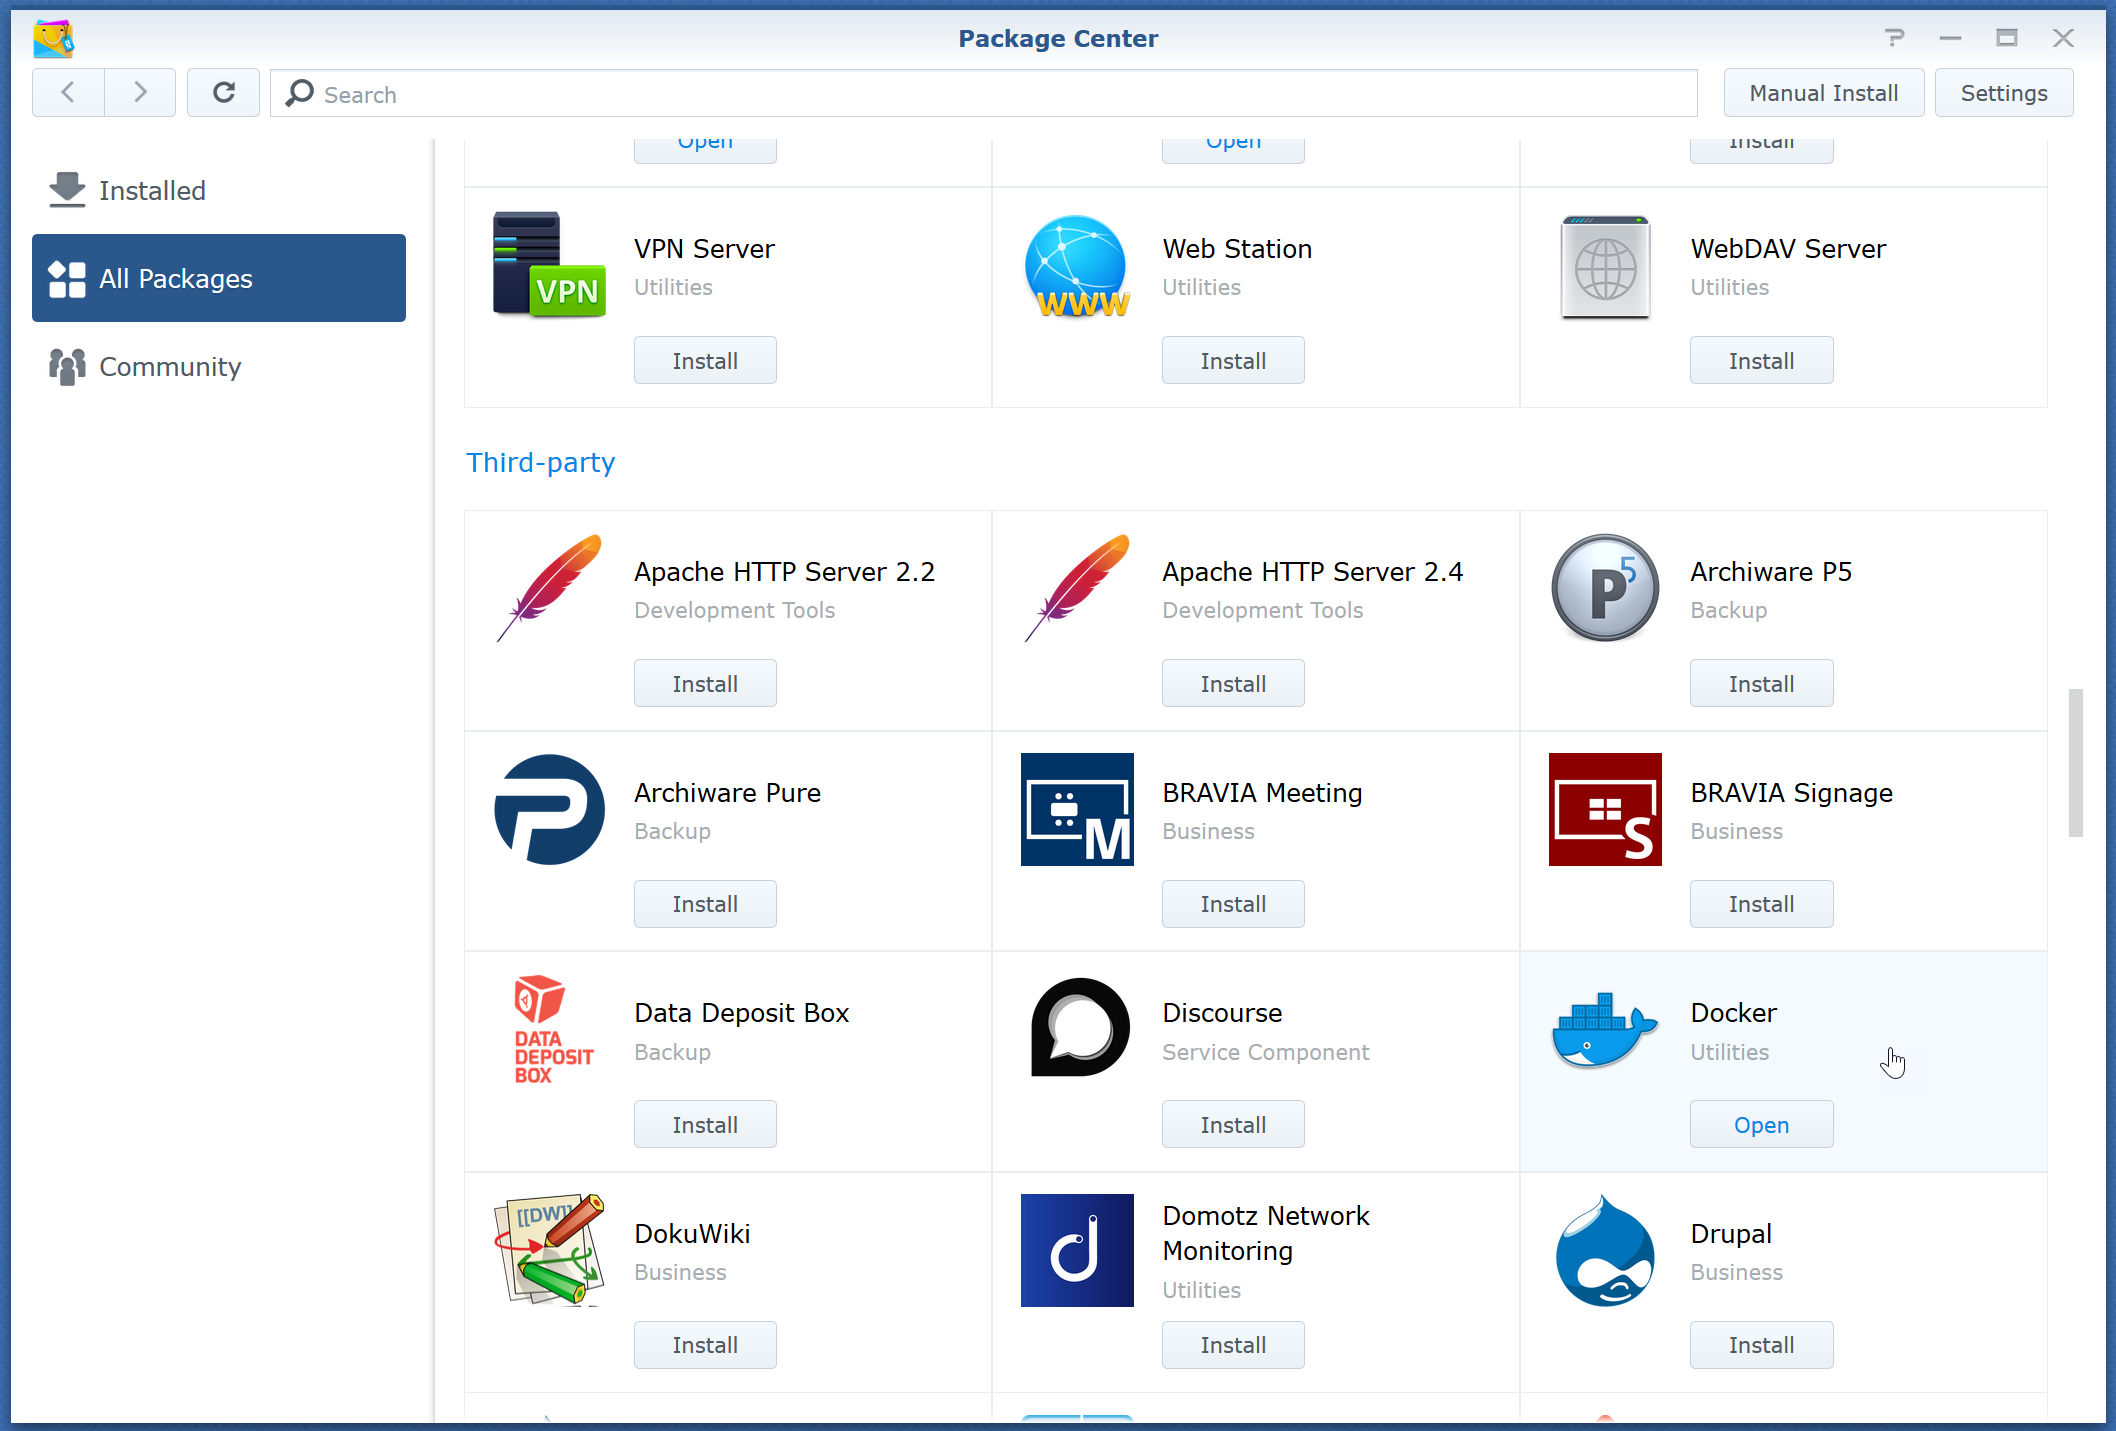
First, open up Package Center and search for the free Third-Party Docker package. If it’s not already installed, go ahead and Install it, otherwise Open it.
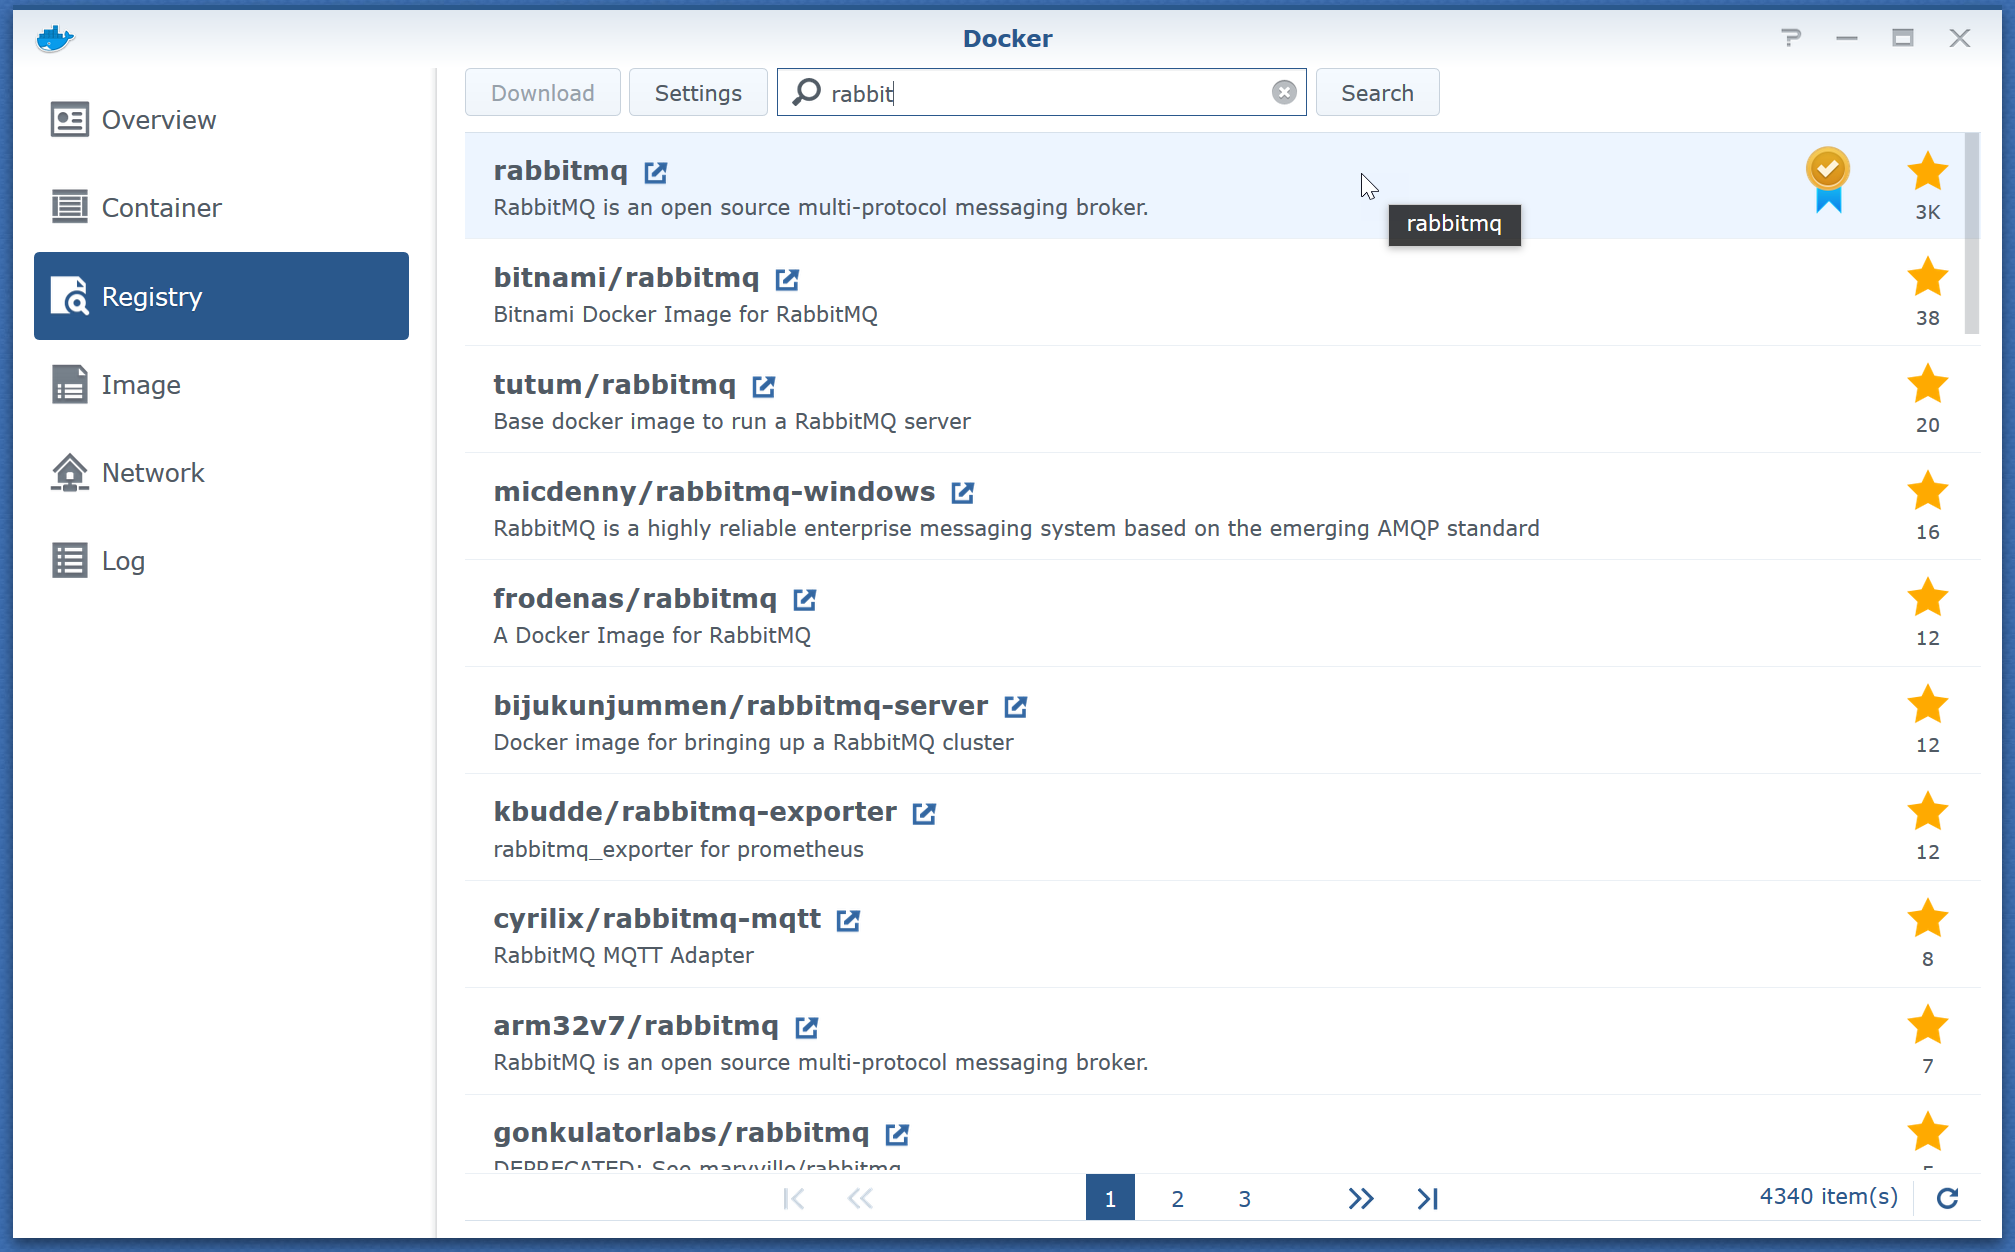
Within the Docker package, we need to search the Registry for the rabbitmq image. Look for the image with the “Official Image” icon next to it, which should be near the top of the search results.
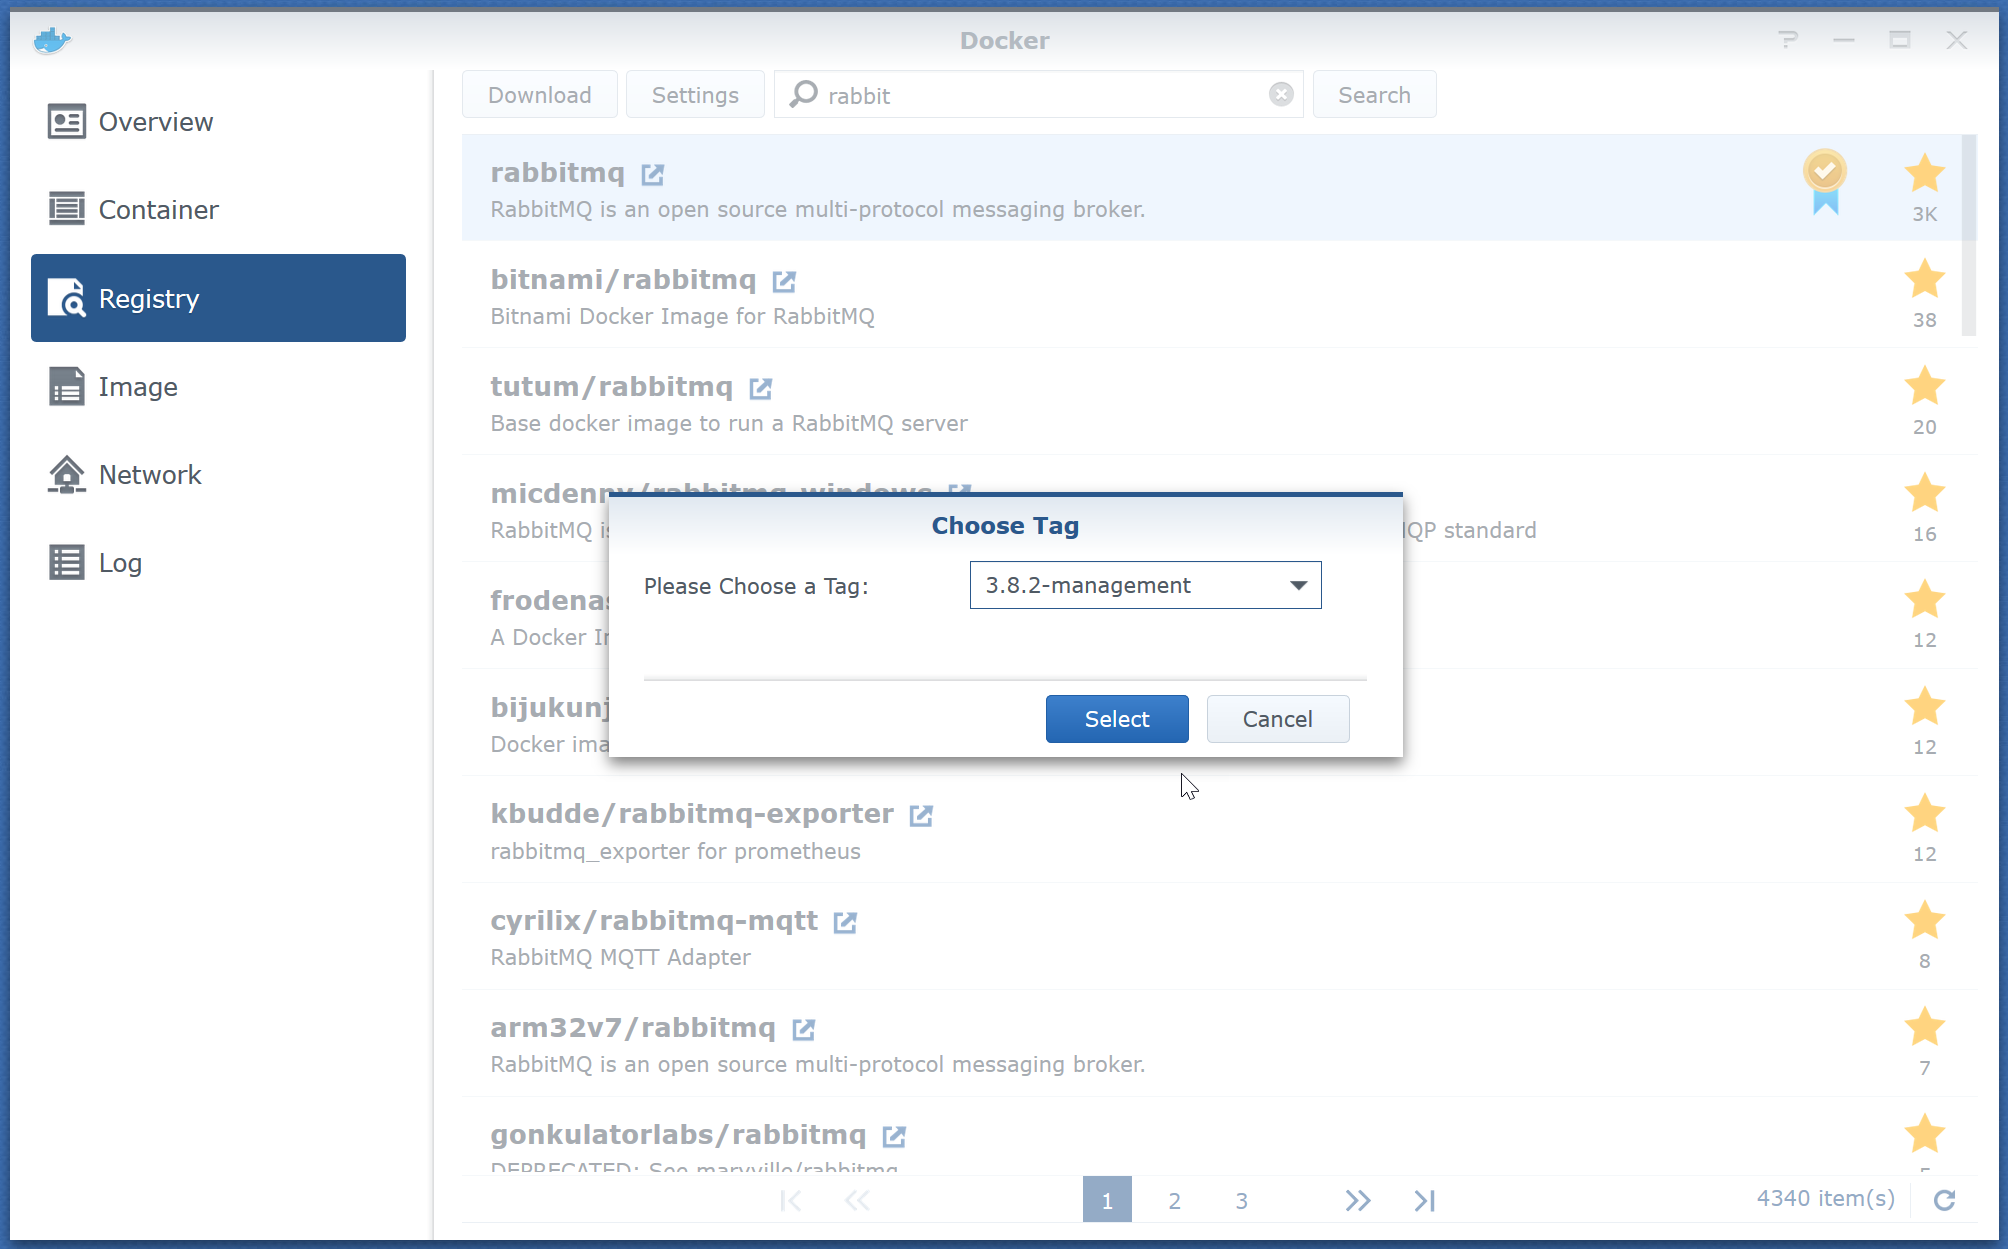
Choose a tag to install. I recommend selecting a recent build with the “management” suffix – these tags have the RabbitMQ management plugin installed and enabled by default, which is available on the standard management port of 15672.
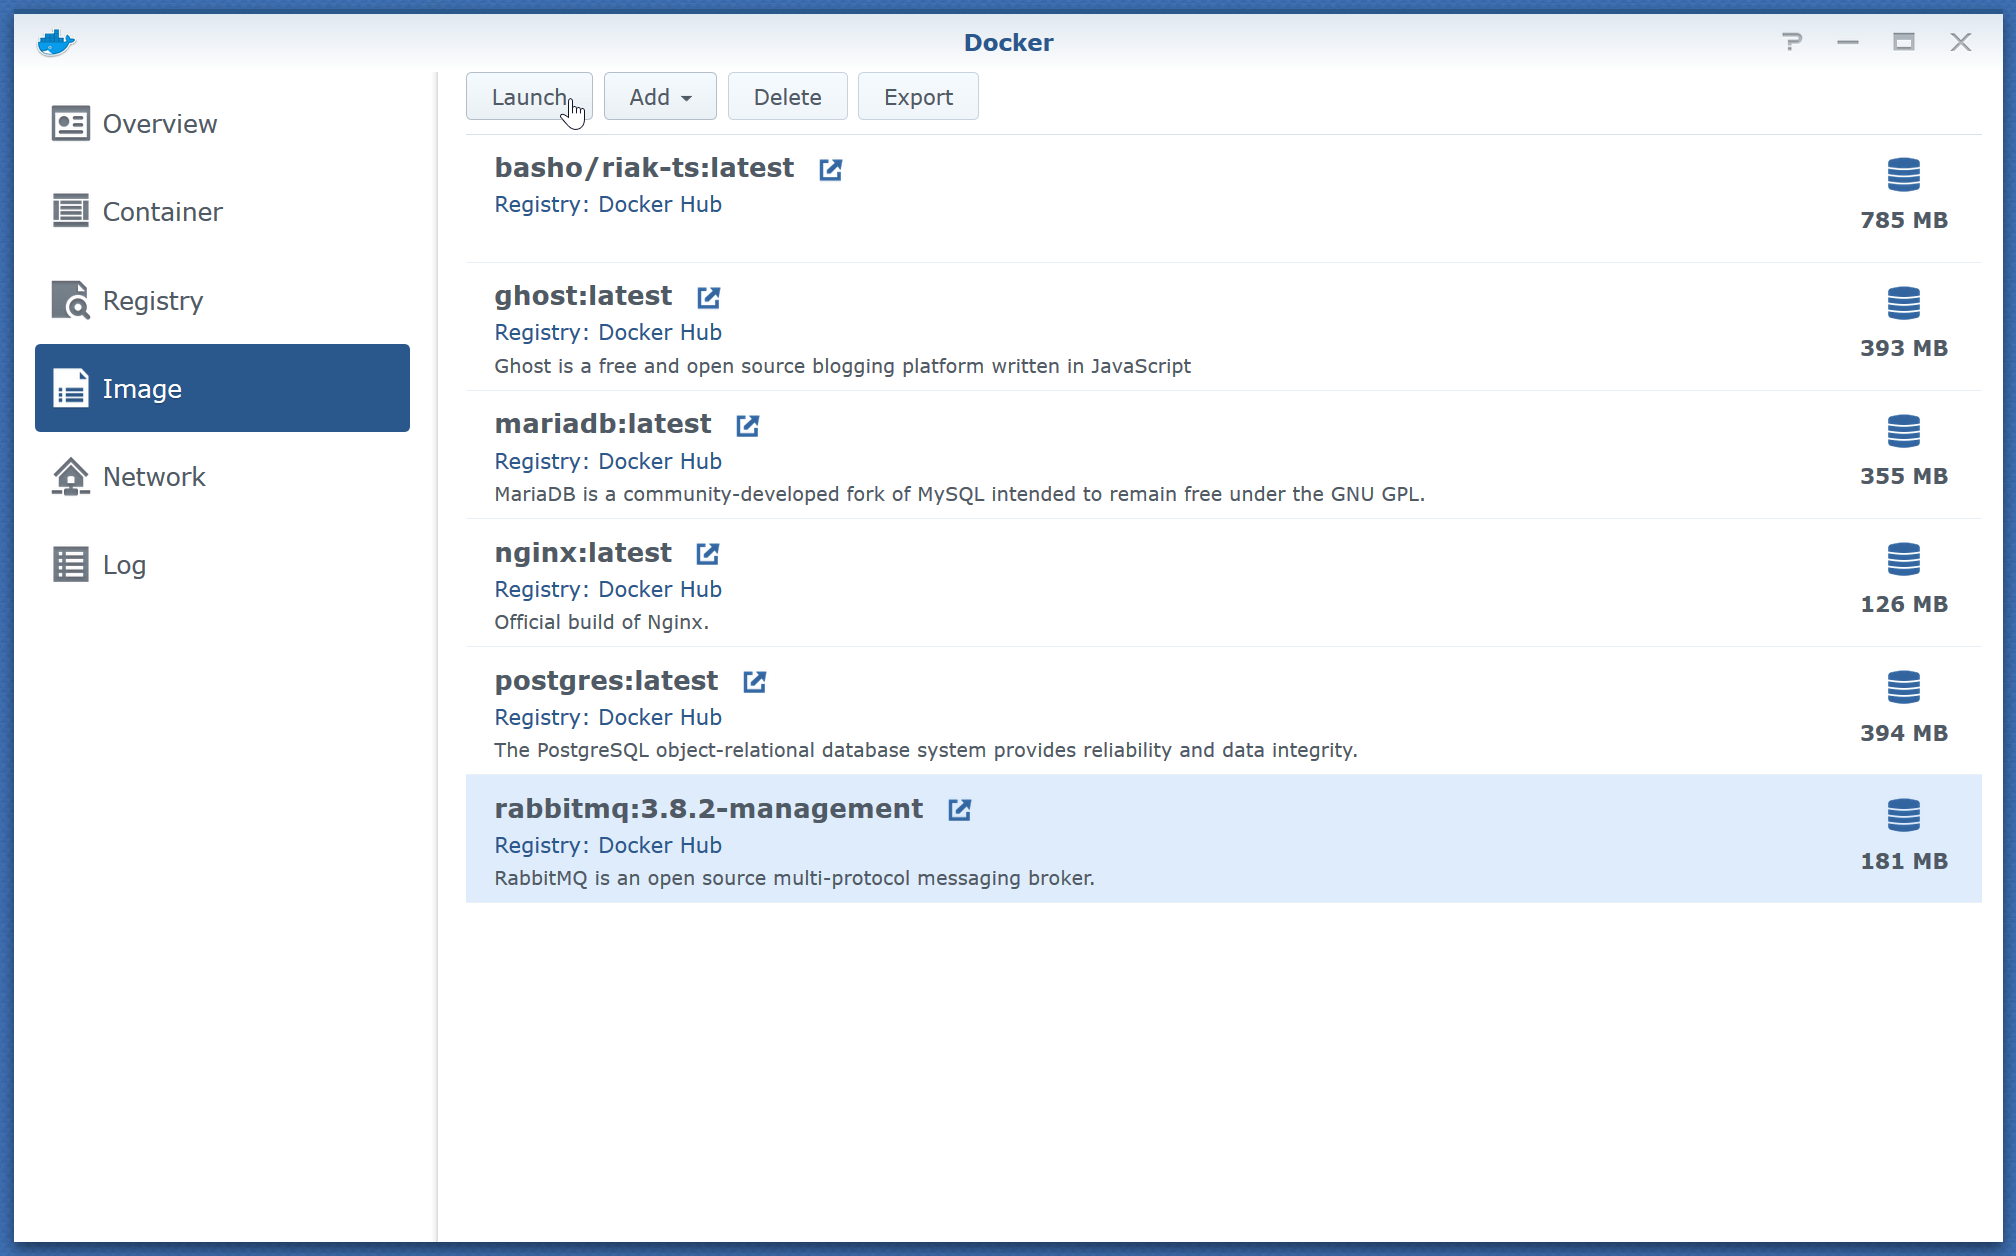
After the Docker image has downloaded to the NAS, select it from the list of images on the Image tab, and click Launch to create a new container from that image.
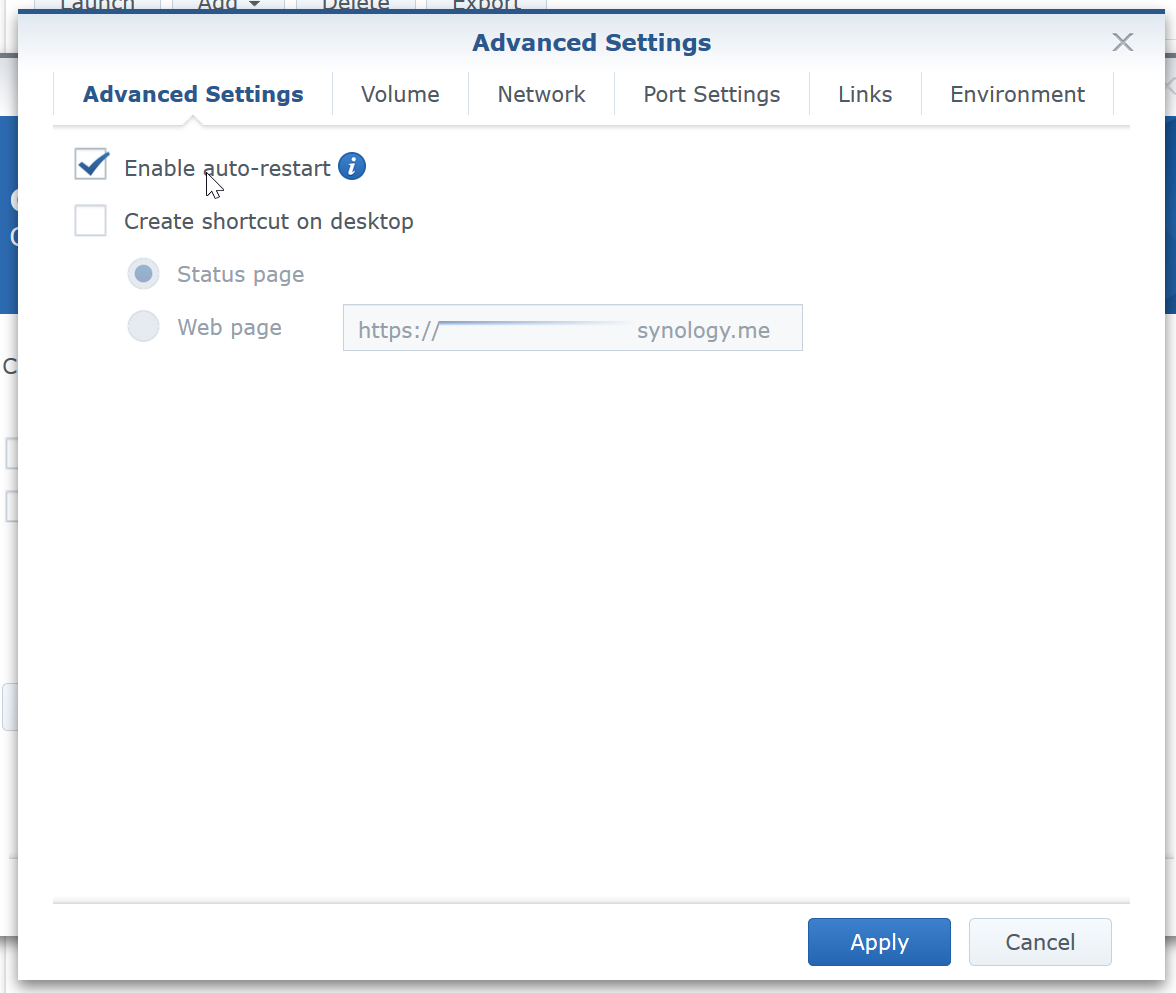
Give the new container a suitable name (rabbitmq seems the obvious choice), and then click the Advanced settings button.

Check Enable auto-restart so that the container automatically restarts, should it stop for any reason.
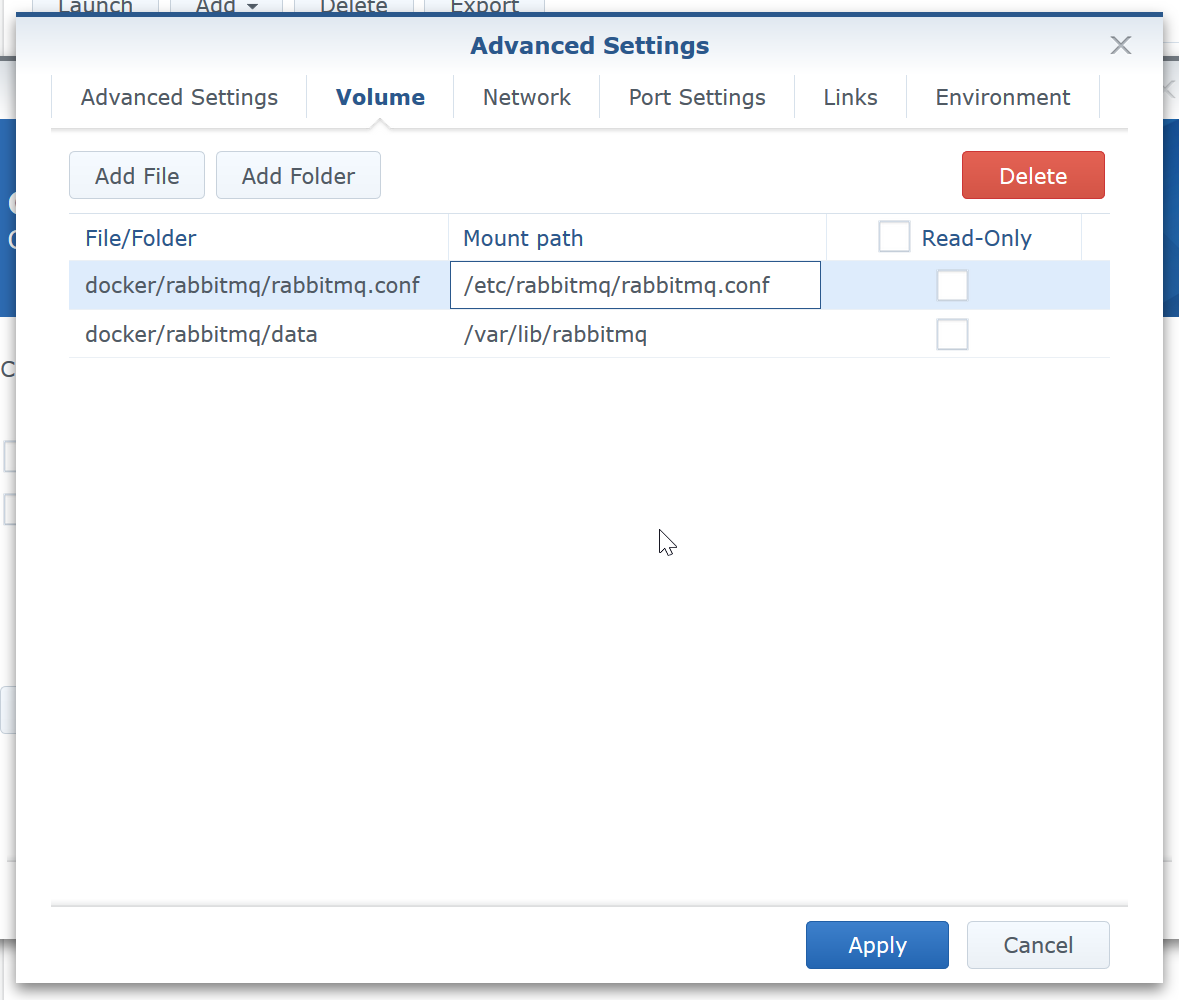
Containers should generally be treated as being replaceable, with any data that you care about being kept outside of the container. To this end, create a folder on the NAS that can be used as a volume for the /var/lib/rabbitmq mount path. This ensures all the data from the RabbitMQ instance exists outside of the container itself and won’t be lost if the container needs to be destroyed and recreated for any reason (such as upgrading to a new version of RabbitMQ). I also suggest creating a blank RabbitMQ config file – rabbitmq.conf – and mounting this file to the path /etc/rabbitmq/rabbitmq.conf .
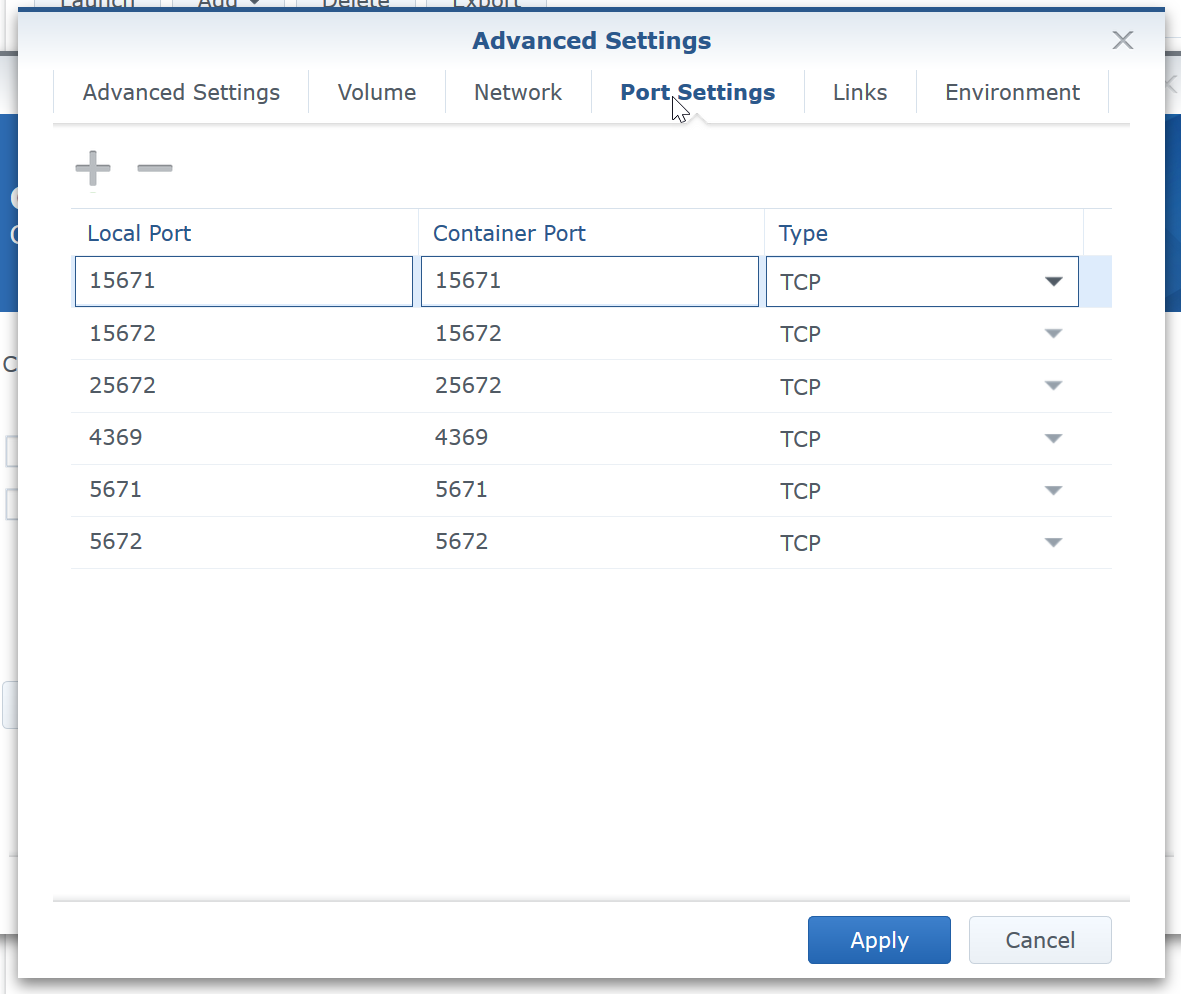
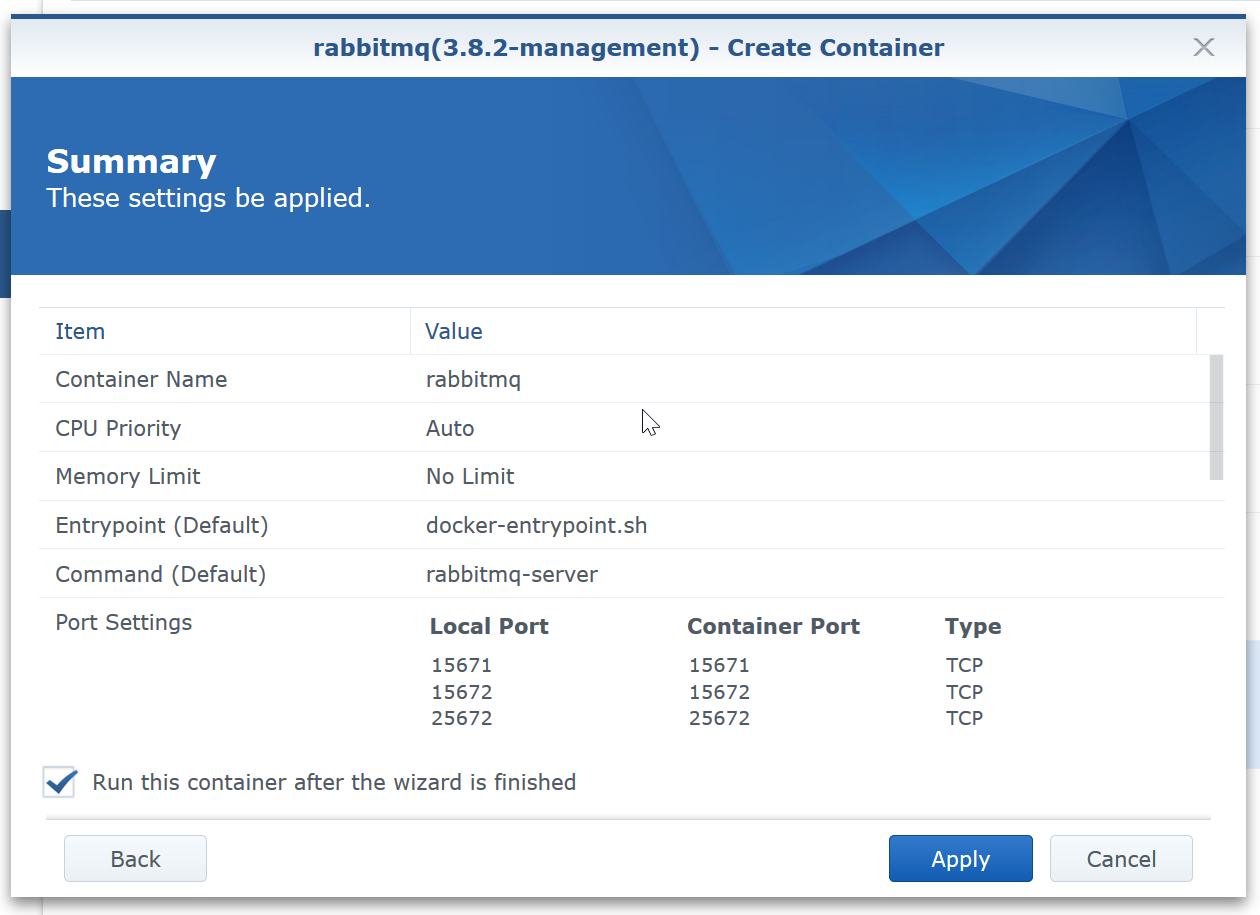
RabbitMQ with the management plugin enabled uses ports 4369, 5671, 5672, 15671, 15672 and 25672. There’s a low probability of these ports already being in use by other applications on the NAS, so map those container ports to the same local ports.
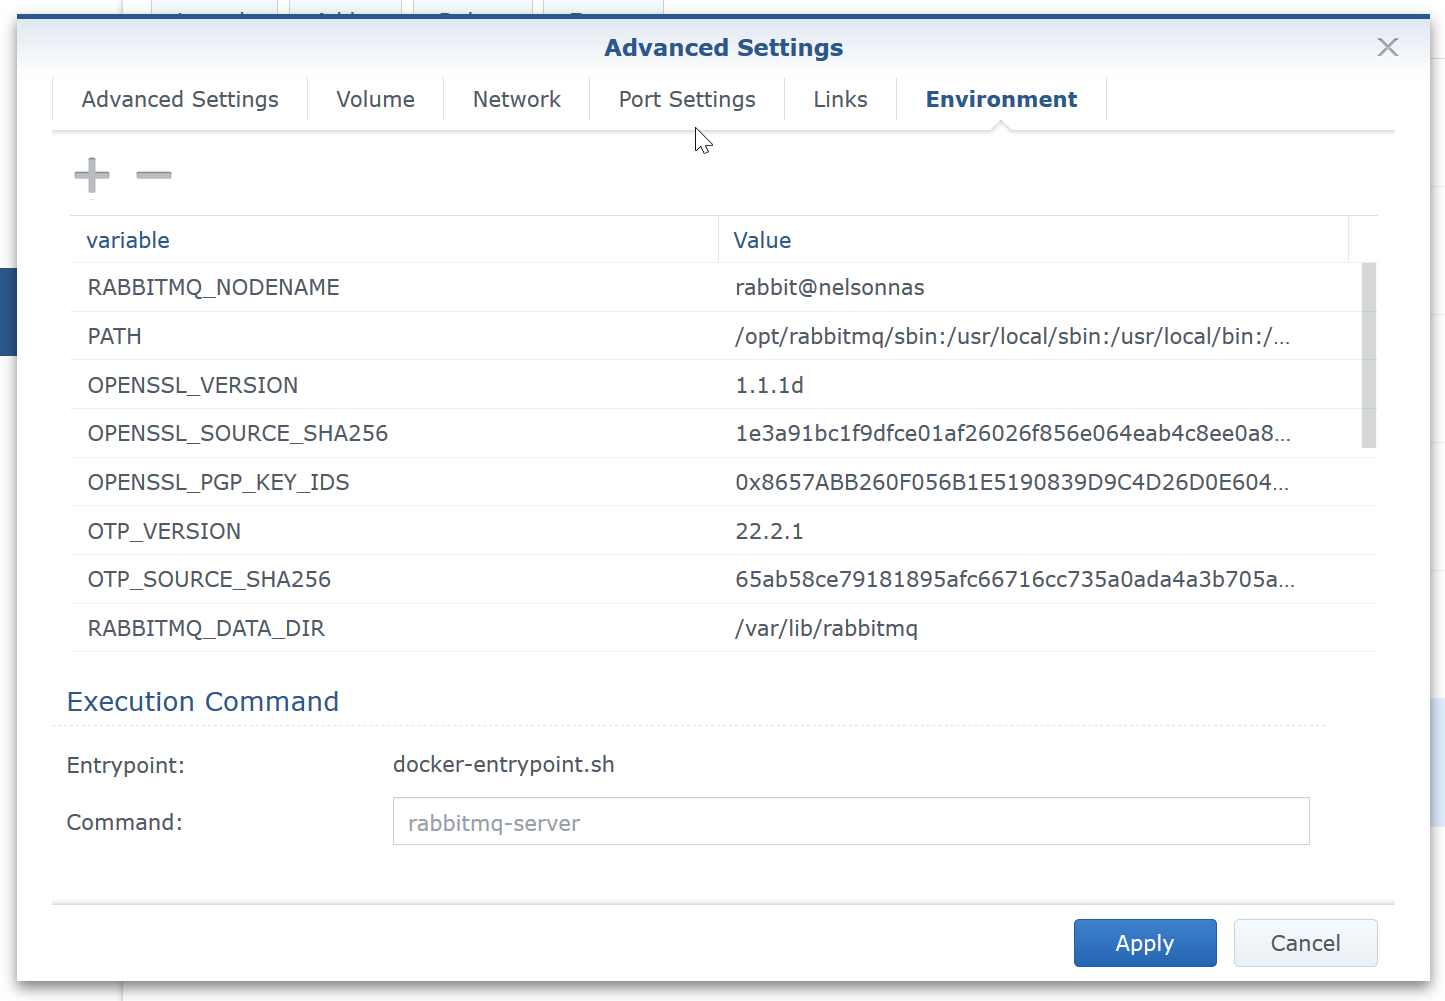
Check the Environment variables tab. The defaults should be fine; you may wish to specify a particular node name – this can be done using the RABBITMQ_NODENAME environment variable
That’s it. Click Apply, and Apply again on the Summary screen.
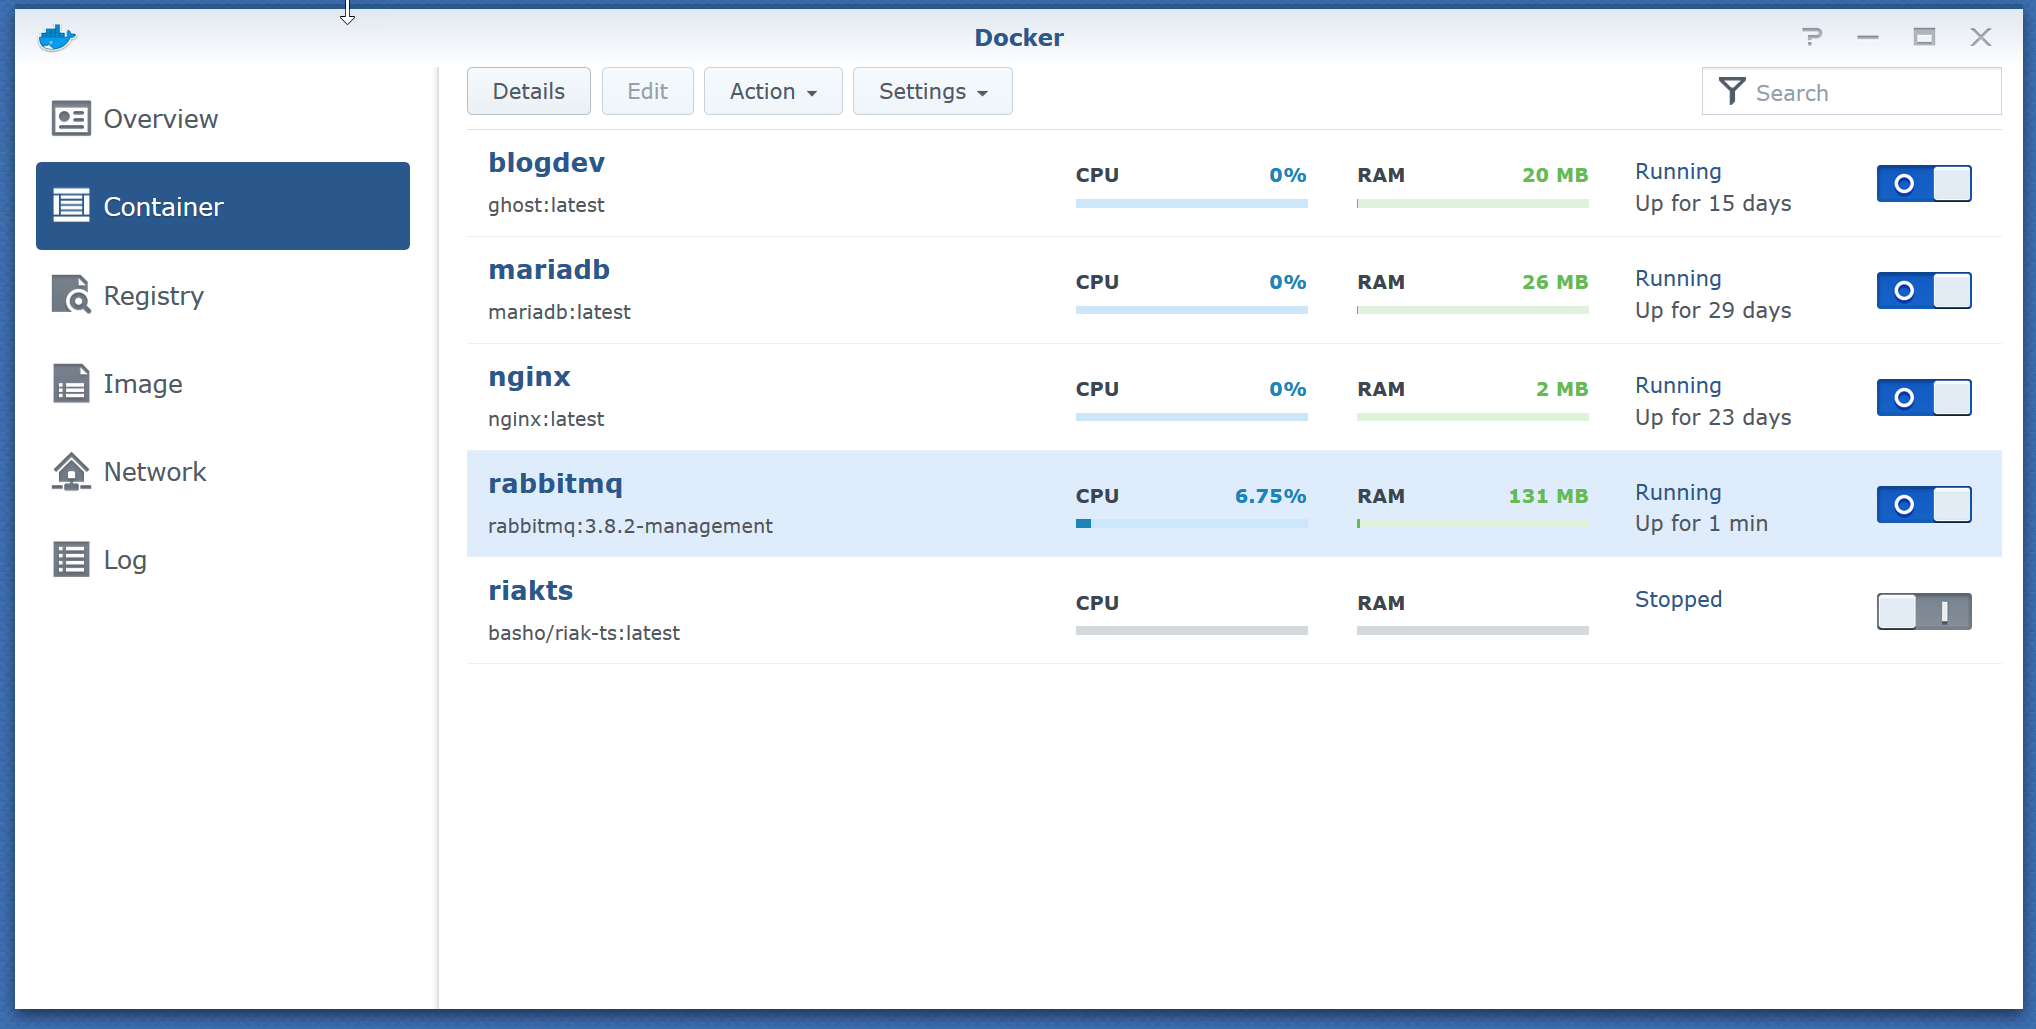
The RabbitMQ docker container will start, and if everything has gone to plan, it should stay running and not restart. To check out the logs, select the container from the Container tab and click the Details button.
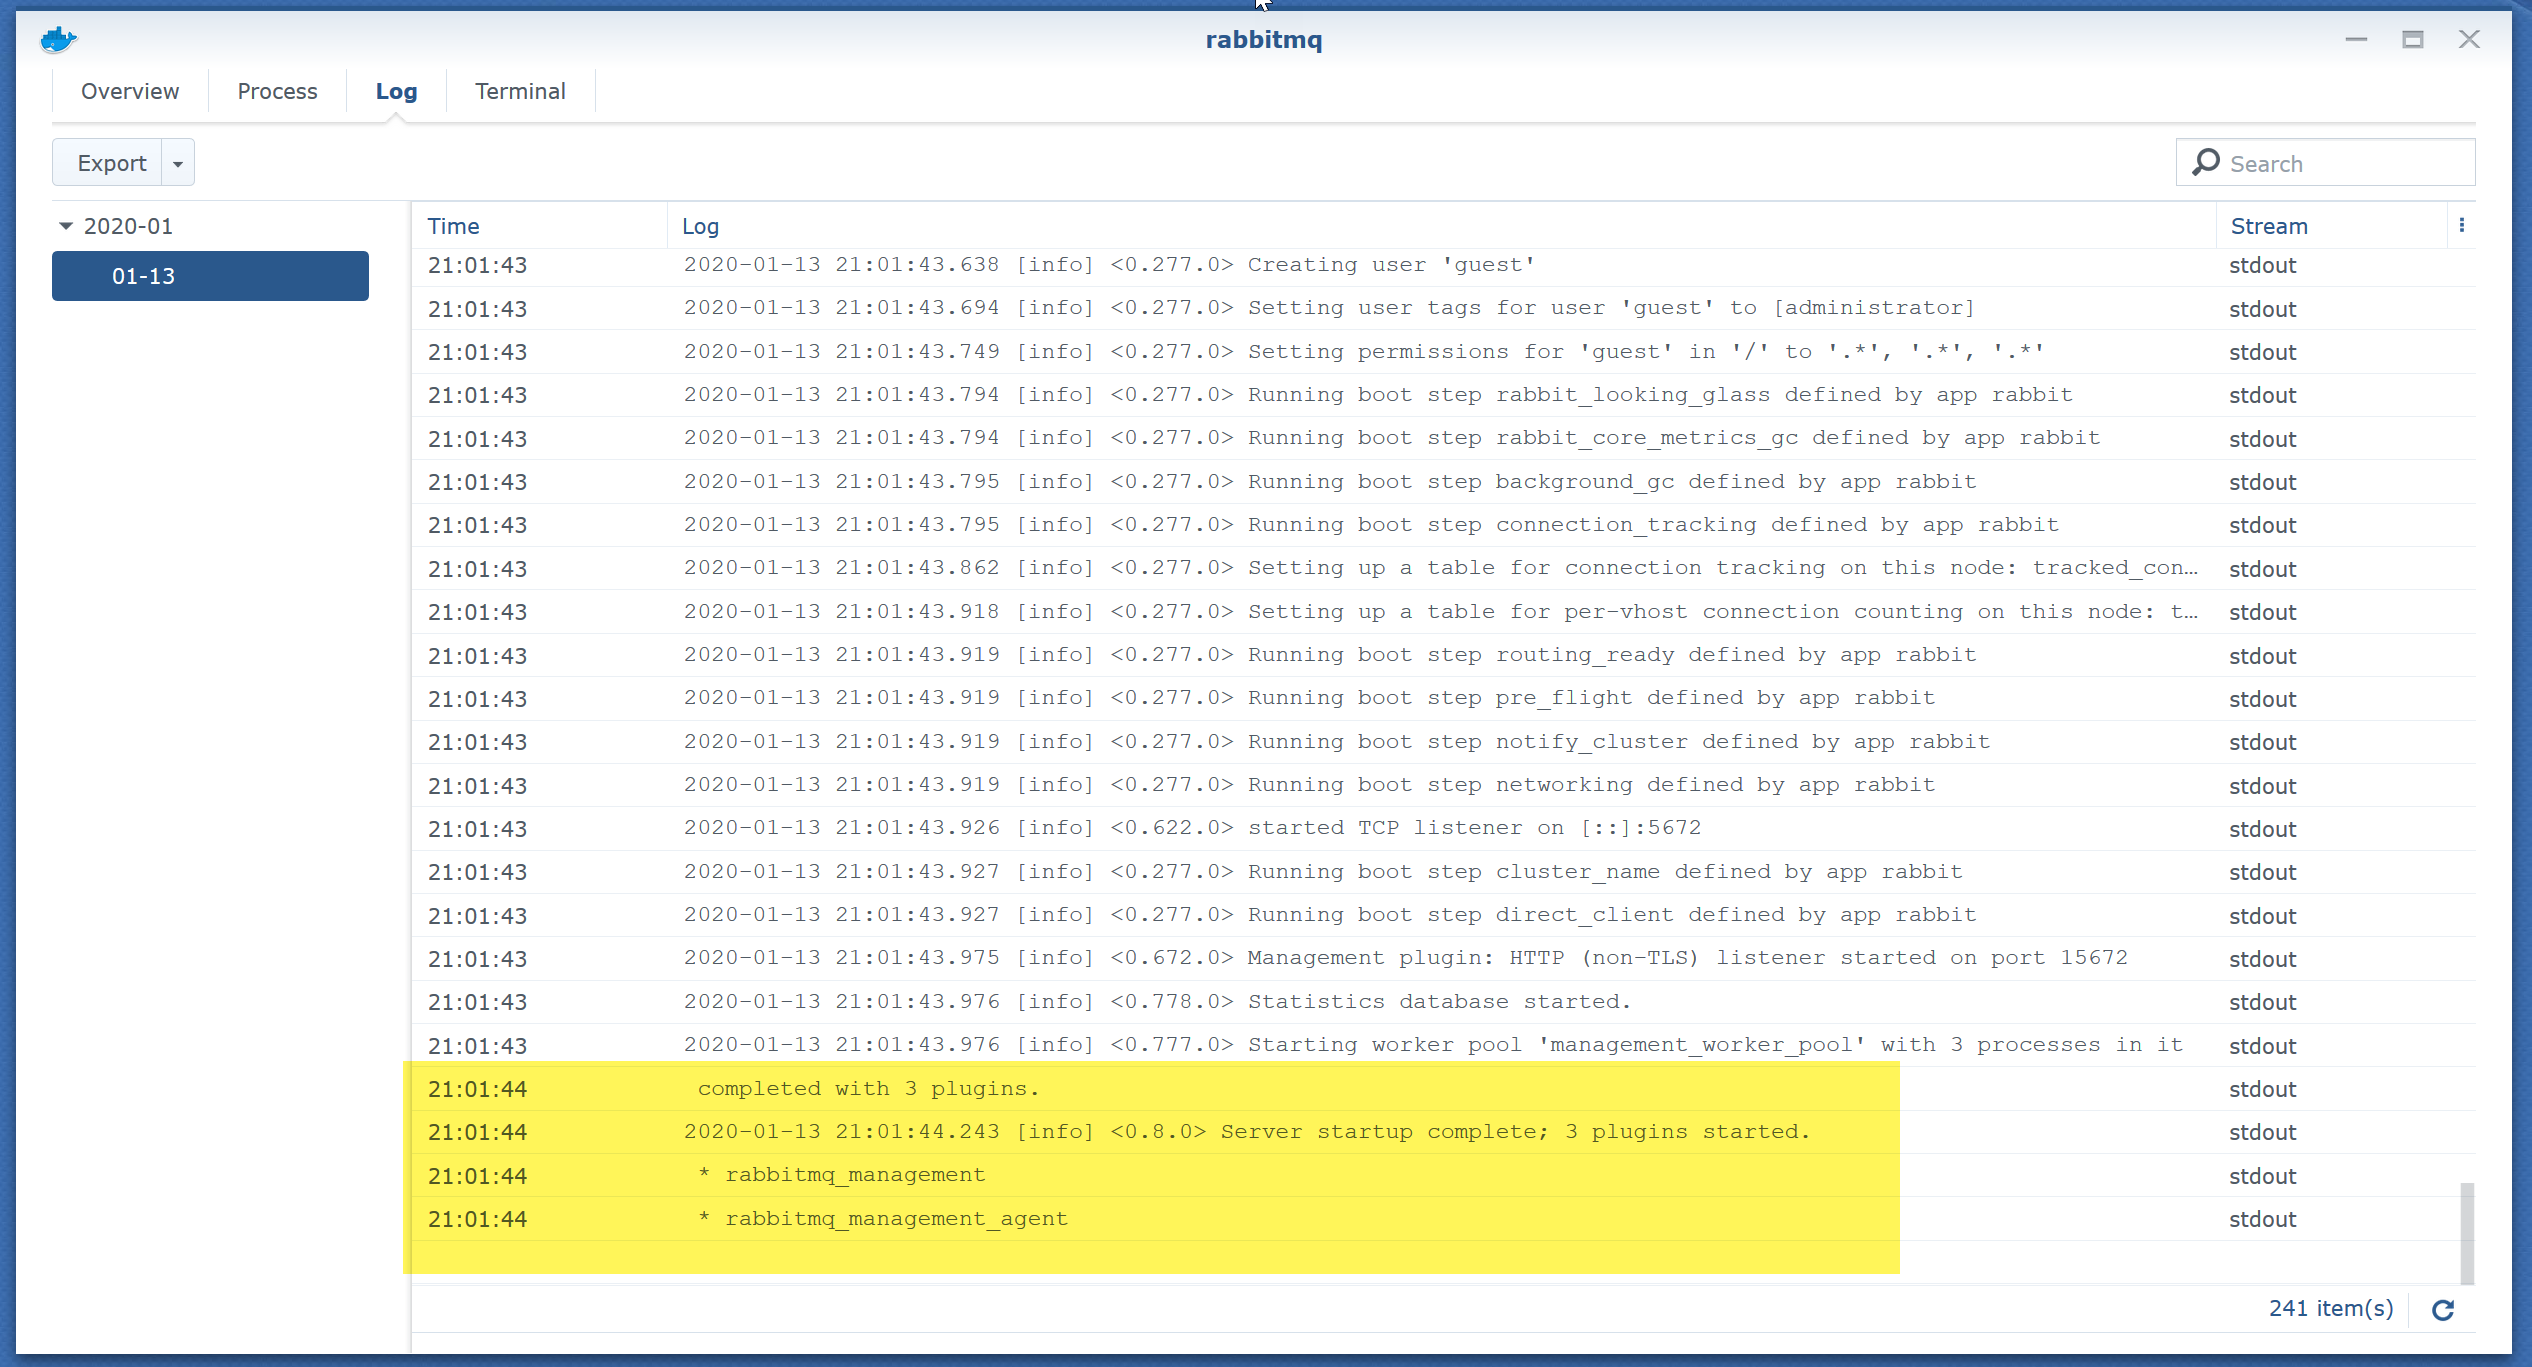
From the details, click the Log tab. If startup has been successful, you will the “Server startup complete; 3 plugins started.” message as shown below. Otherwise, these logs should give a useful indication what has gone wrong.
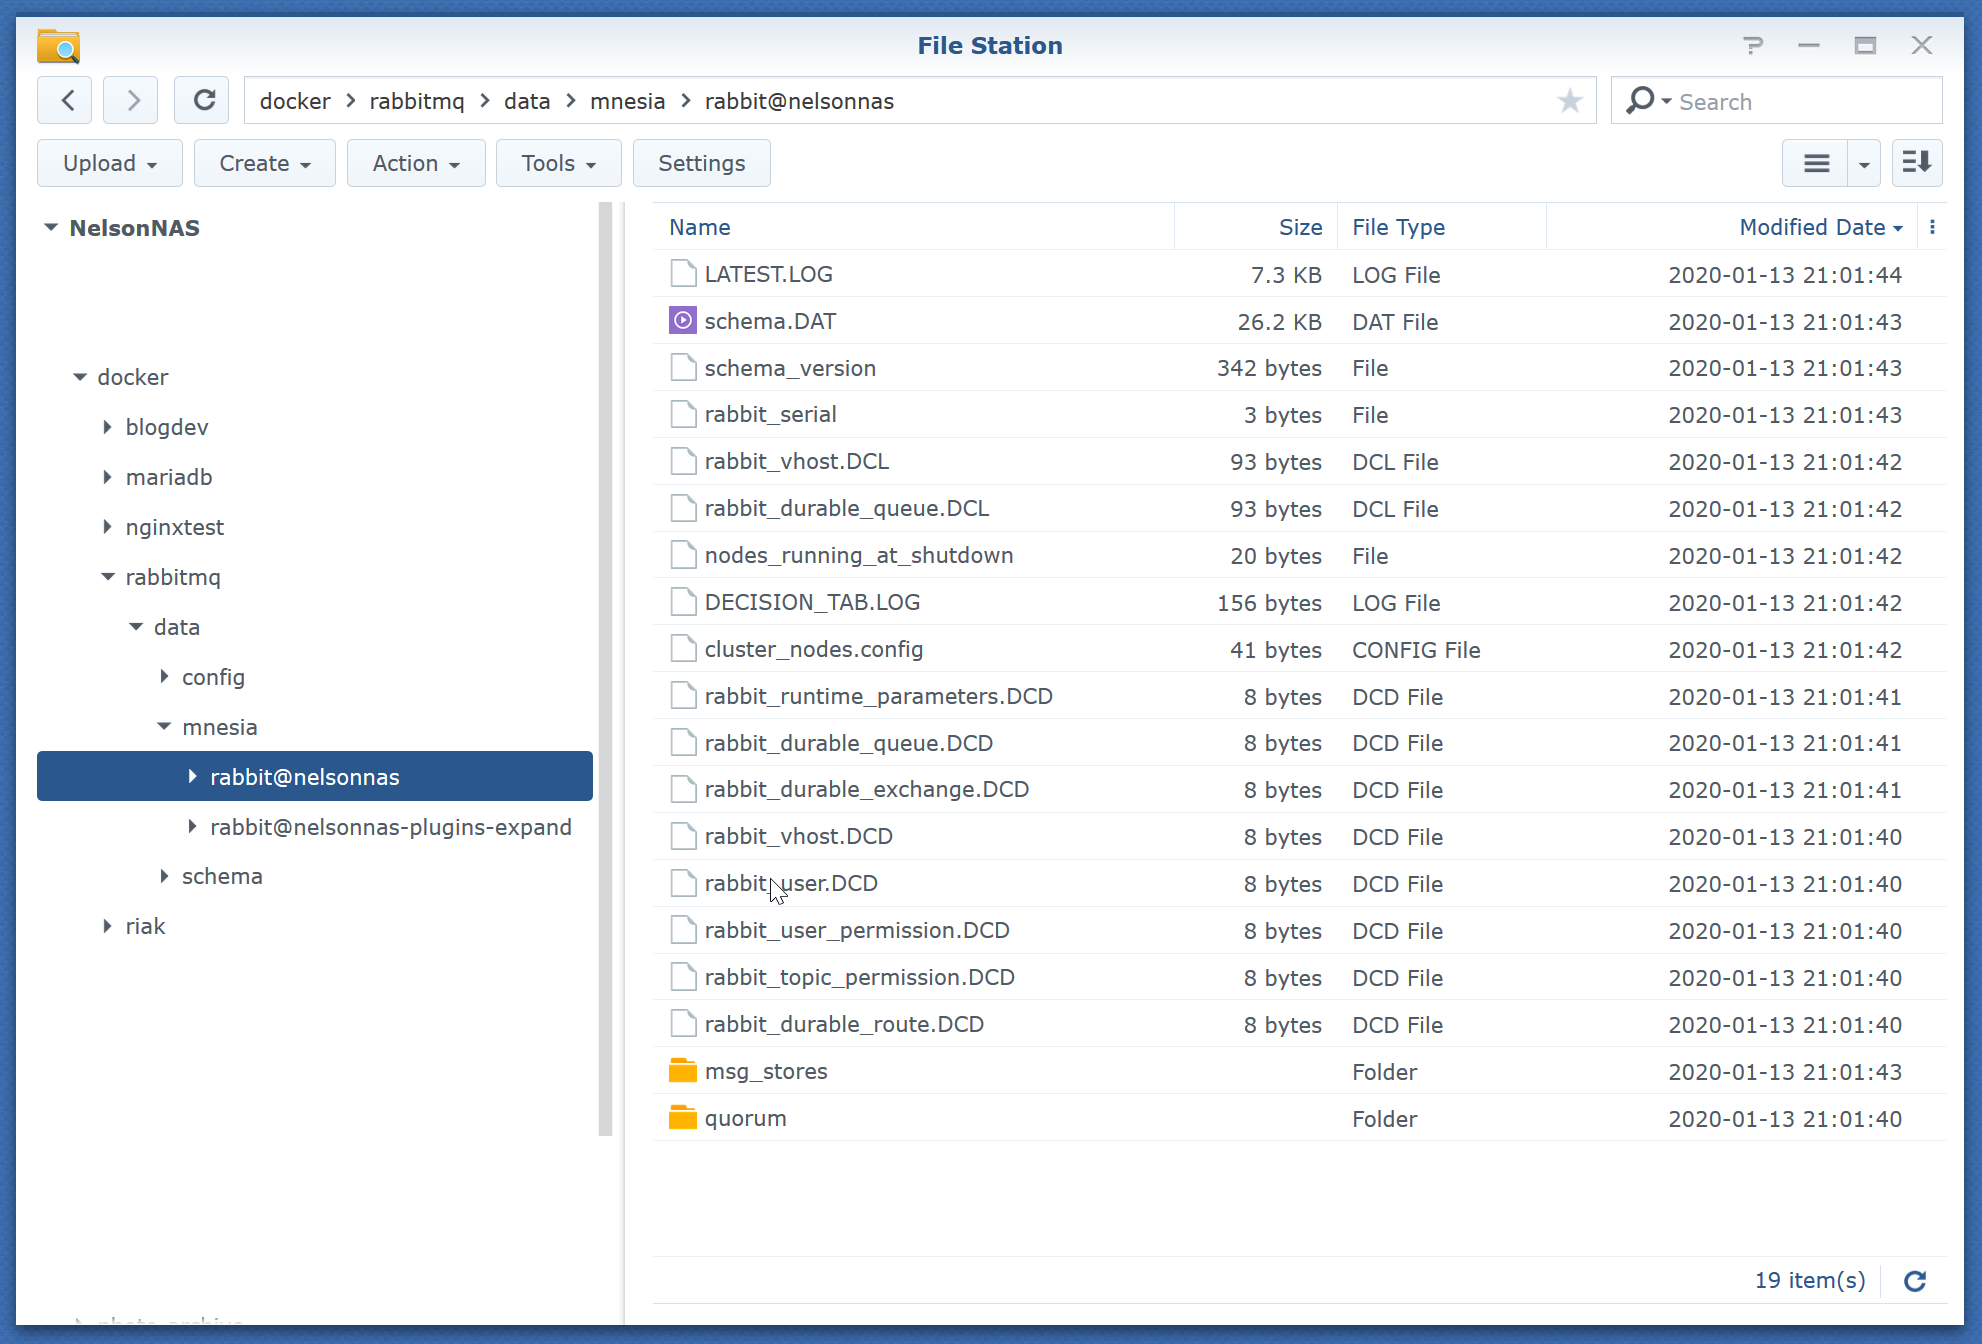
The RabbitMQ mnesia folder will be initialized in the folder specified earlier as a mapped volume.
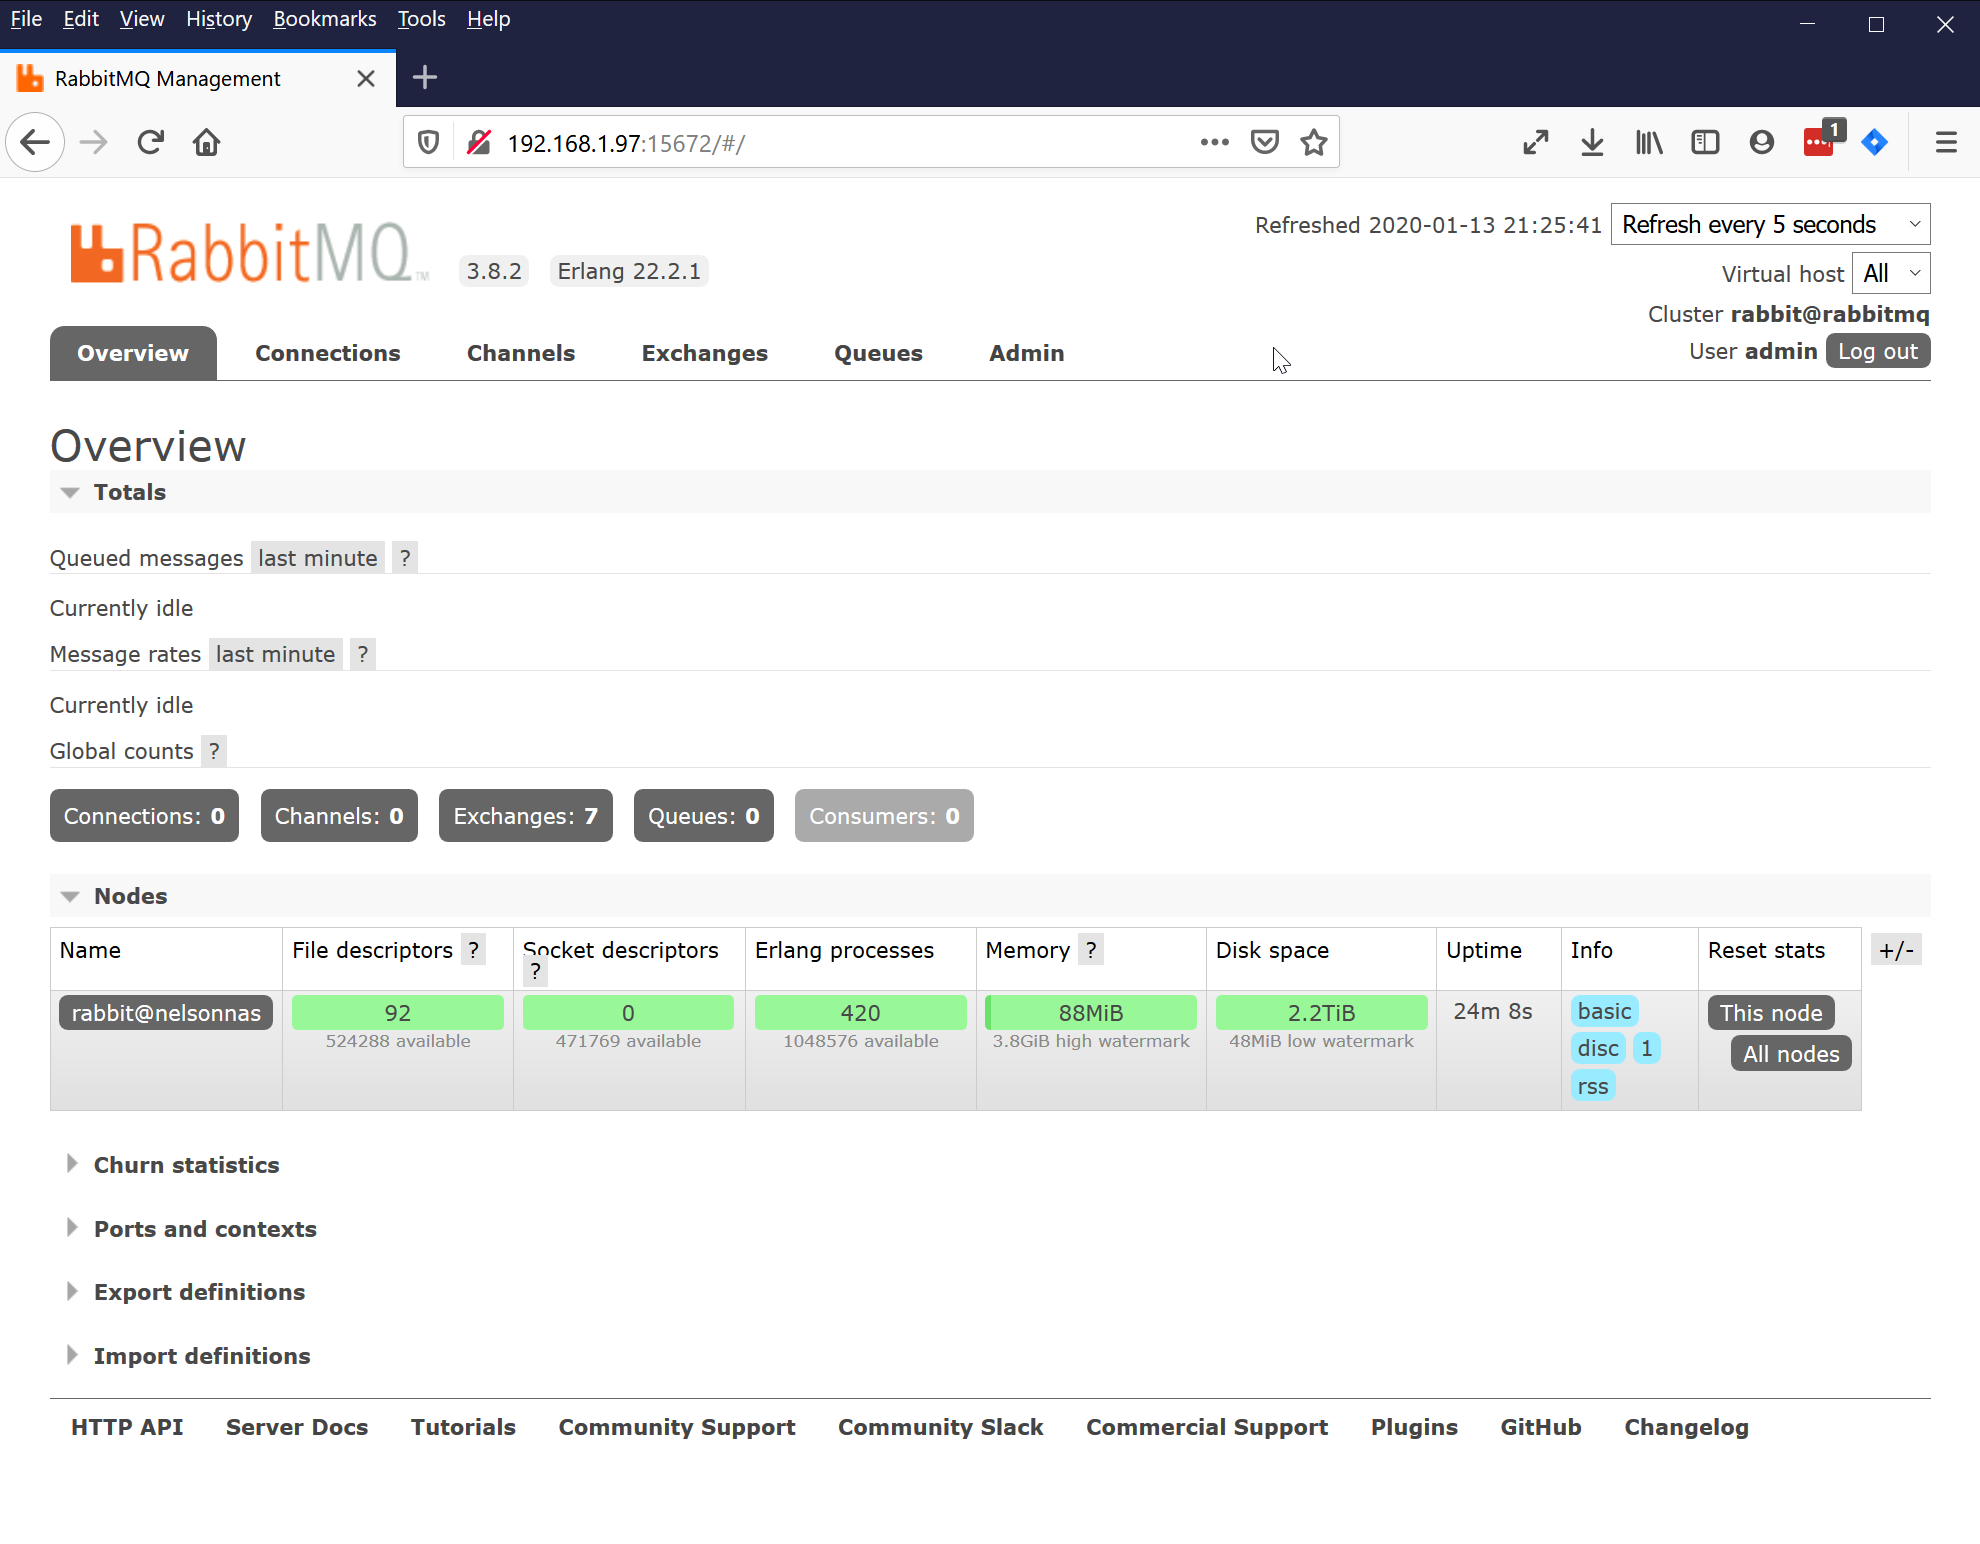
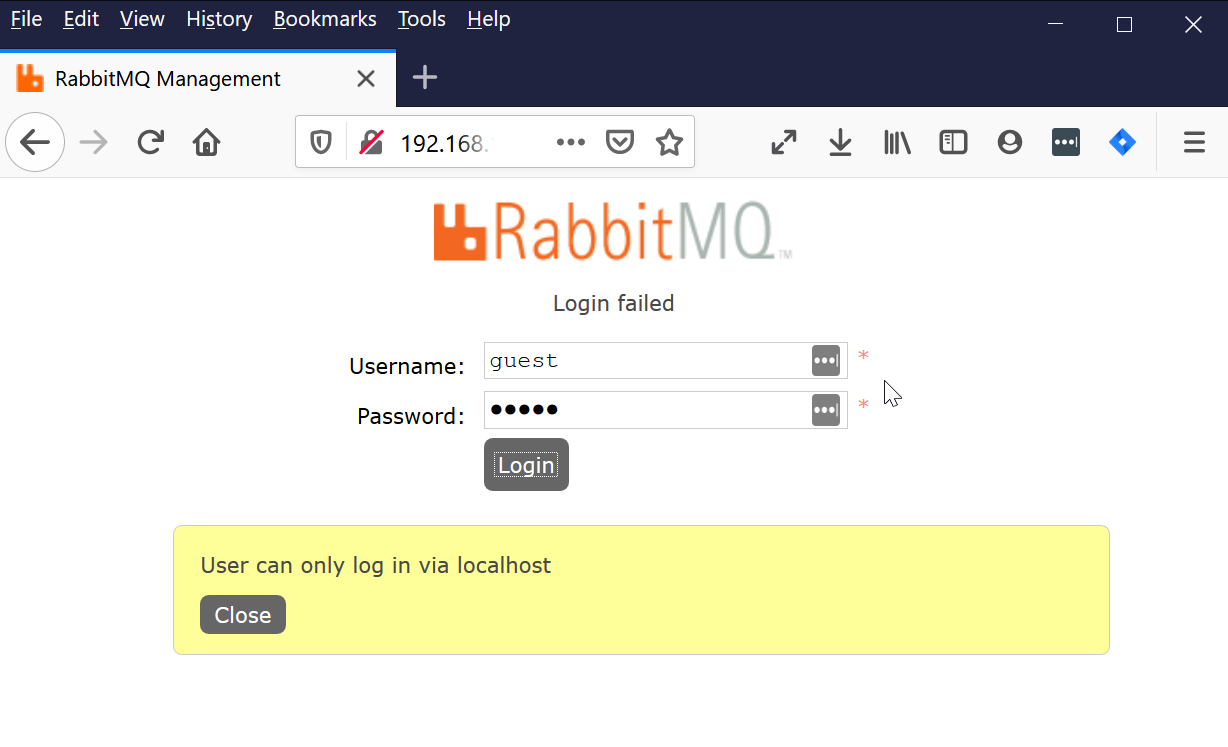
The RabbitMQ Management portal will be accessible through a web browser at port 15672 on your NAS’s hostname or IP address. But if you try to login using the default guest/guest credentials you will likely be met with the “User can only log in via localhost” message shown below. That’s not an option from the Synology NAS, which doesn’t have any web browser installed.
There are a couple of solutions to this quandary. The rabbitmq.conf file created earlier could be edited to allow the guest user to connect from a remote host by setting the loopback_users configuration to none – details here.
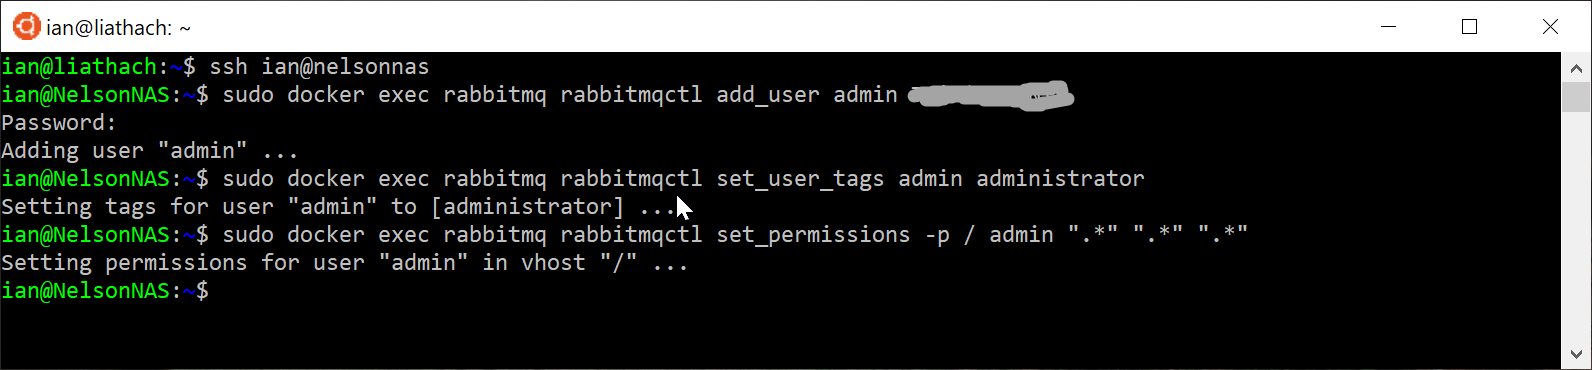
Alternatively, the rabbitmqctl utility can be used to add a new user with administrator rights, as shown in the screenshot below.
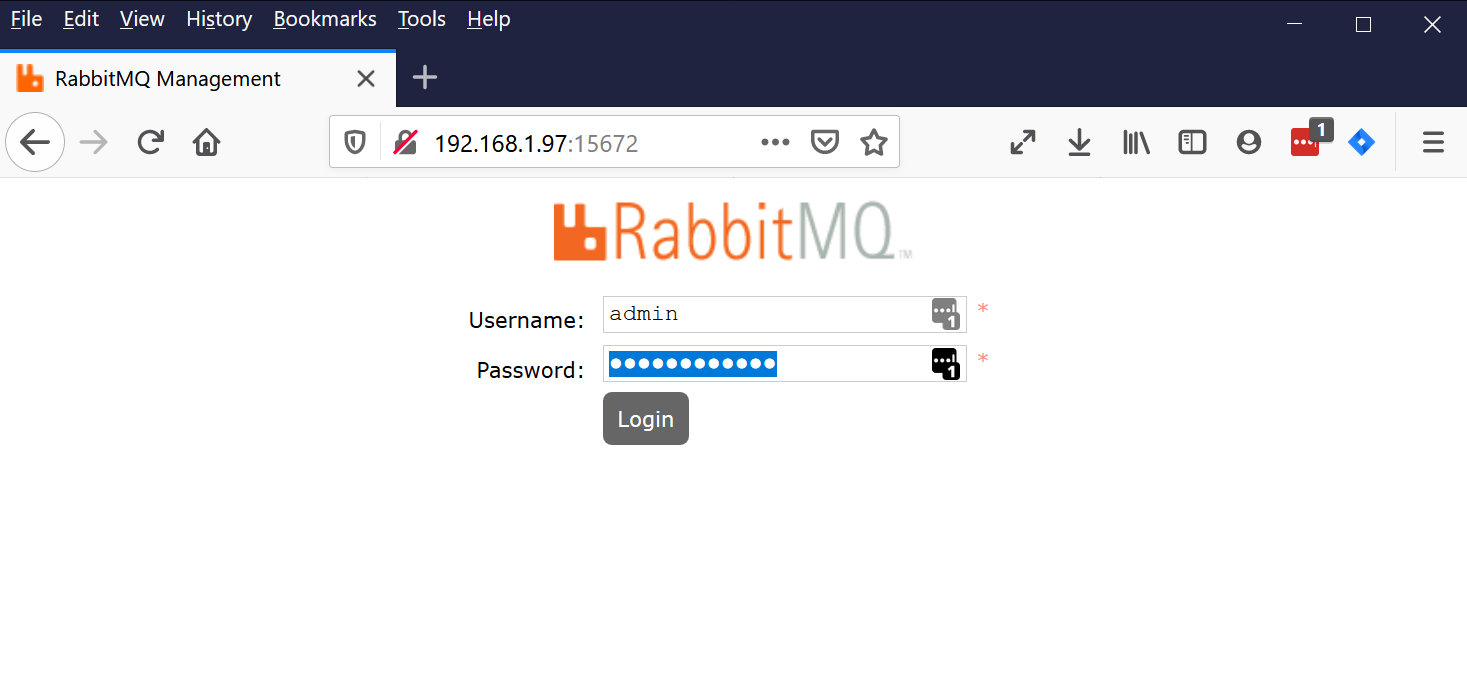
Having done this, it will be possible to login to the RabbitMQ management console from a remote machine using the newly-created credentials.
Boom! There we have it. RabbitMQ running in a Docker image, on a Synology NAS, with the management plugin accessible from the local network.